 The spacing is a percentage of the picture dimensions. The Border slider allows you to change the spacing between the pictures. Pick a template for your collage based on the number of pictures you would like to use (up to 8 photos). You can select an aspect ratio to change the proportions of your collage. By checking Combine you are able to combine multiple photos in the source folder to create the final image.īy selecting Collage you are able to create a collage of your photos. To change the color of the borders, click the color button to open the color picker window. Press the Help icon in the effect settings window for more information about the Warhol effect and the meaning of the parameters.īy selecting Grid the photos are placed in a grid, a pattern made from horizontal and vertical pictures spaced out at regular intervals. This option allows you to apply random colors to the Warhol effects.Ĭlick on the button with the dots to bring up the effect settings window. This option allows you to apply a random style to the Warhol effects. This option allows you to fit the images to the paper size.įor example, if the original file names are IMG_3774.jpg, IMG_3775.jpg, IMG_3776.jpg.įor the Che effect the file names in the destination folder become: IMG_3774_1.jpg, IMG_3775_1.jpg, IMG_3776_1.jpg.įor the Marilyn effect the file names in the destination folder become: IMG_3774_2.jpg, IMG_3775_2.jpg, IMG_3776_2.jpg. This option allows you to select the printer. This option allows you to automatically print the converted images. Any new files will be converted by the system. This option allows you to check for new files in the source folder every n seconds. Use the following options while converting your images: Choose the output file format and the JPG or GIF settings if applicable. In the Destination tab you can browse for the destination folder.Ĭheck Sequence to use the filename as entered in the text box and a sequence number as suffix, for example Image01.jpg - Image99.jpg.īy unchecking this option, the original file names are preserved. 
In the Source tab you can browse for the source (Watch) folder.Ĭhoose your own selection of files by checking Custom selection from the list and click the files in the list. The first tab in the Andy Warhol Batch Conversion window enables you to select the source folder and the destination folder. The last tab shows the progress during the batch processing. The first tab contains the file folders and general options, while others affect the behavior of the batch process. 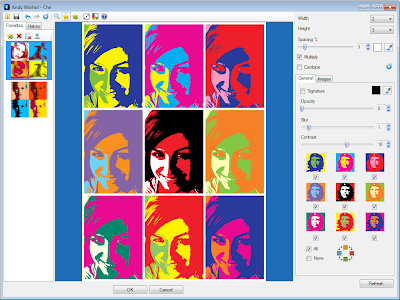.png "pop art photo converter")
The Batch Conversion dialog window contains a number of tabs (File, Resize, Rotate/Flip, Effects, etc.). The Batch option can be found in the Effects toolbar, or in the main menu under Effects > Andy Warhol Batch Conversion. You can enter this key directly into the registration form of the program. You don't need to download any additional software.īy purchasing the Batch Edition you will receive a license key that unlocks the Andy Warhol Batch Conversion option. The Batch Edition is the same piece of software as the regular version of Pop Art Studio. Add text overlays, your company logo, or watermarks.Apply Andy Warhol effects (Batch Edition only).Add picture frames and apply special effects.Adjust Colors and Levels for brightness, gamma, chroma, contrast, hue, sharpness, blur.Convert image formats from any format to JPG, BMP, GIF, PNG, or TIF.With the Pop Art Studio Batch Edition you can:
0 Comments
Leave a Reply. |
 RSS Feed
